Add a product
From an empty catalog to a product your site can sell, in about five minutes.
2 min readUpdated View as Markdown
On this page
You need the inventory edit permission (inventory.write). Owners and Admins have it.
1. Create the product
Open Products. In the dashboard sidebar choose Commerce → Inventory → Products. You see every product with its category, brand, status and sizes.
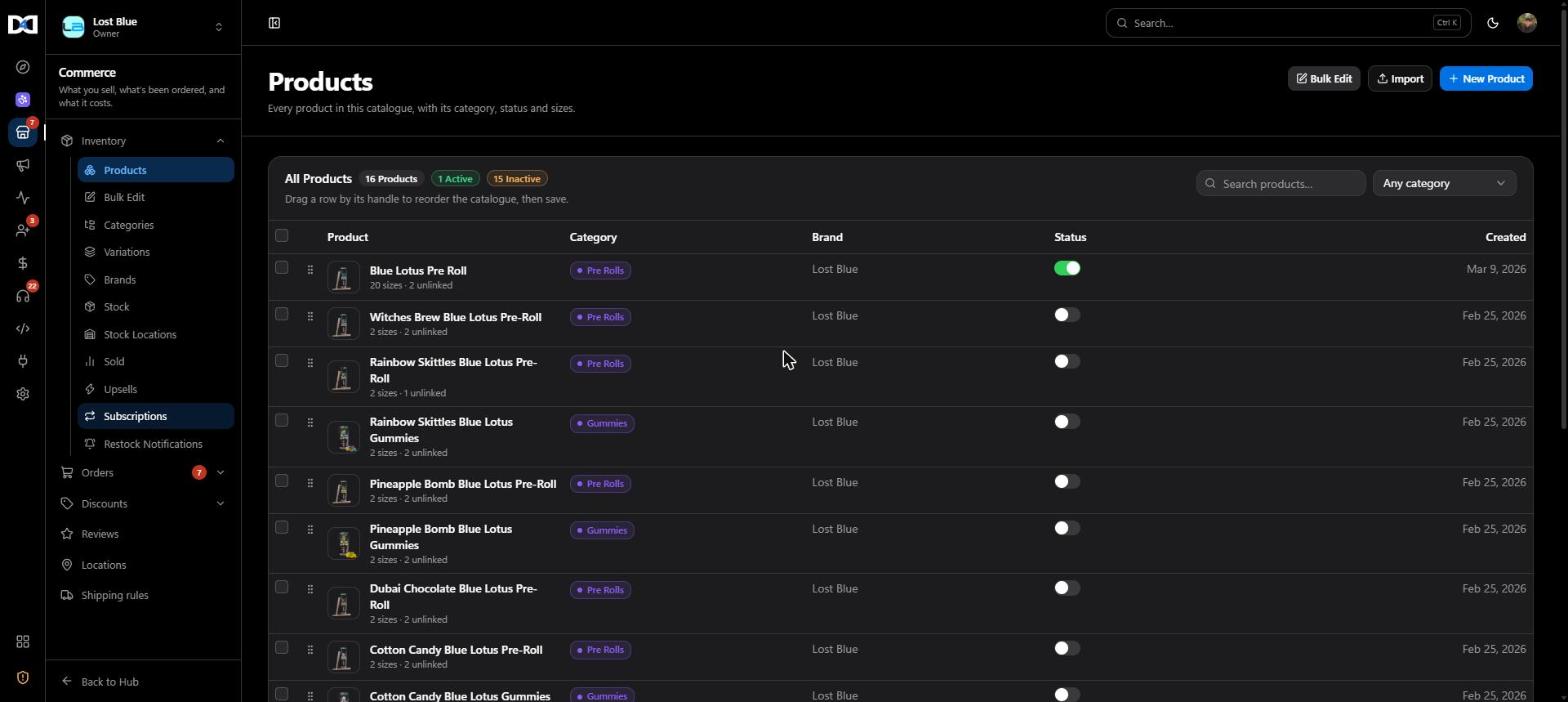
Click New Product at the top right. The New Product form opens.
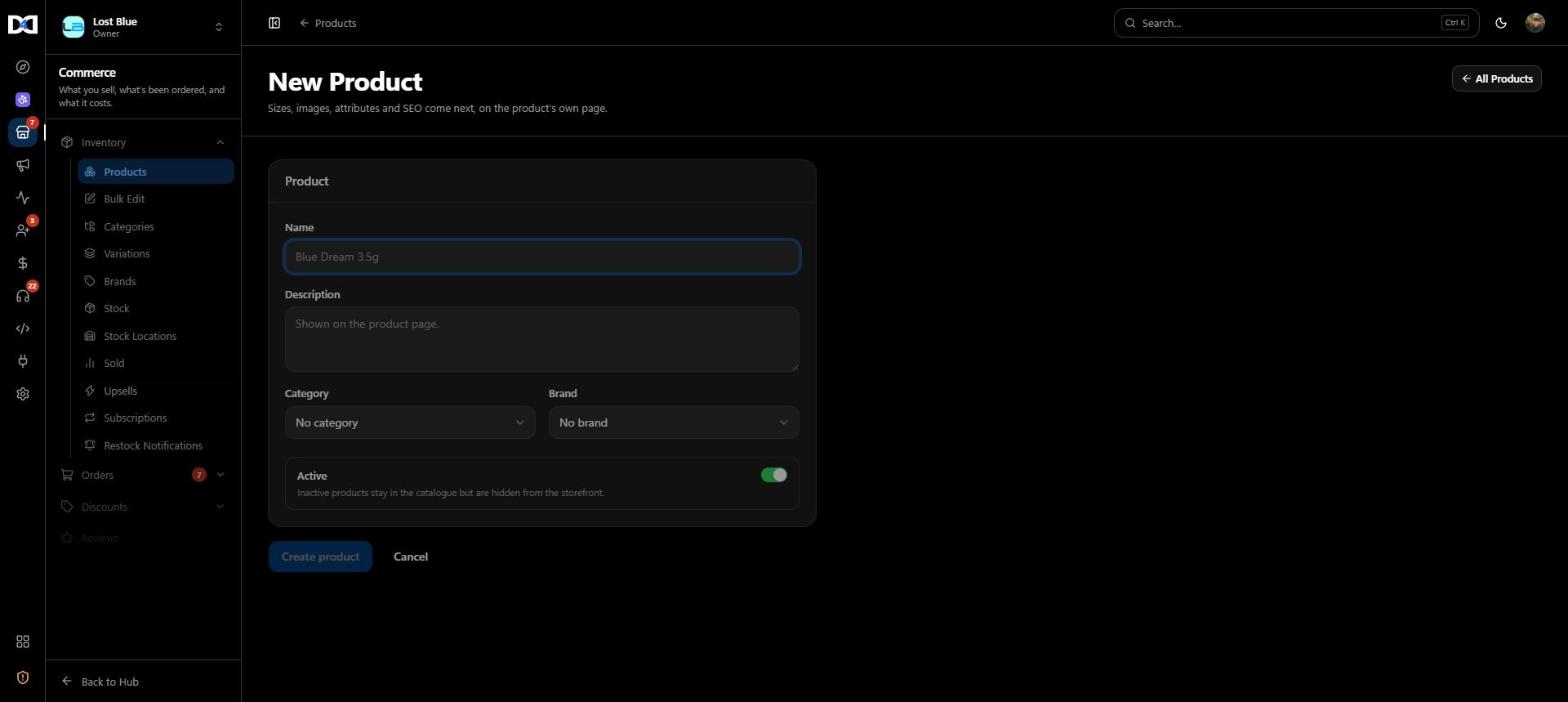
Fill in the basics.
- Name: what customers see, for example "Lemon Loaf".
- Description: shown on the product page.
- Category and Brand: optional, but they make the catalog easier to browse and filter. Create them under Inventory → Categories and Brands.
- Active: leave it on to show the product on your site. An inactive product stays in your catalog but is hidden from the storefront.
Click Create product. You land on the product's own page. The figures at the top show its sizes, stock, price range and when it was created; the tabs below hold everything else.
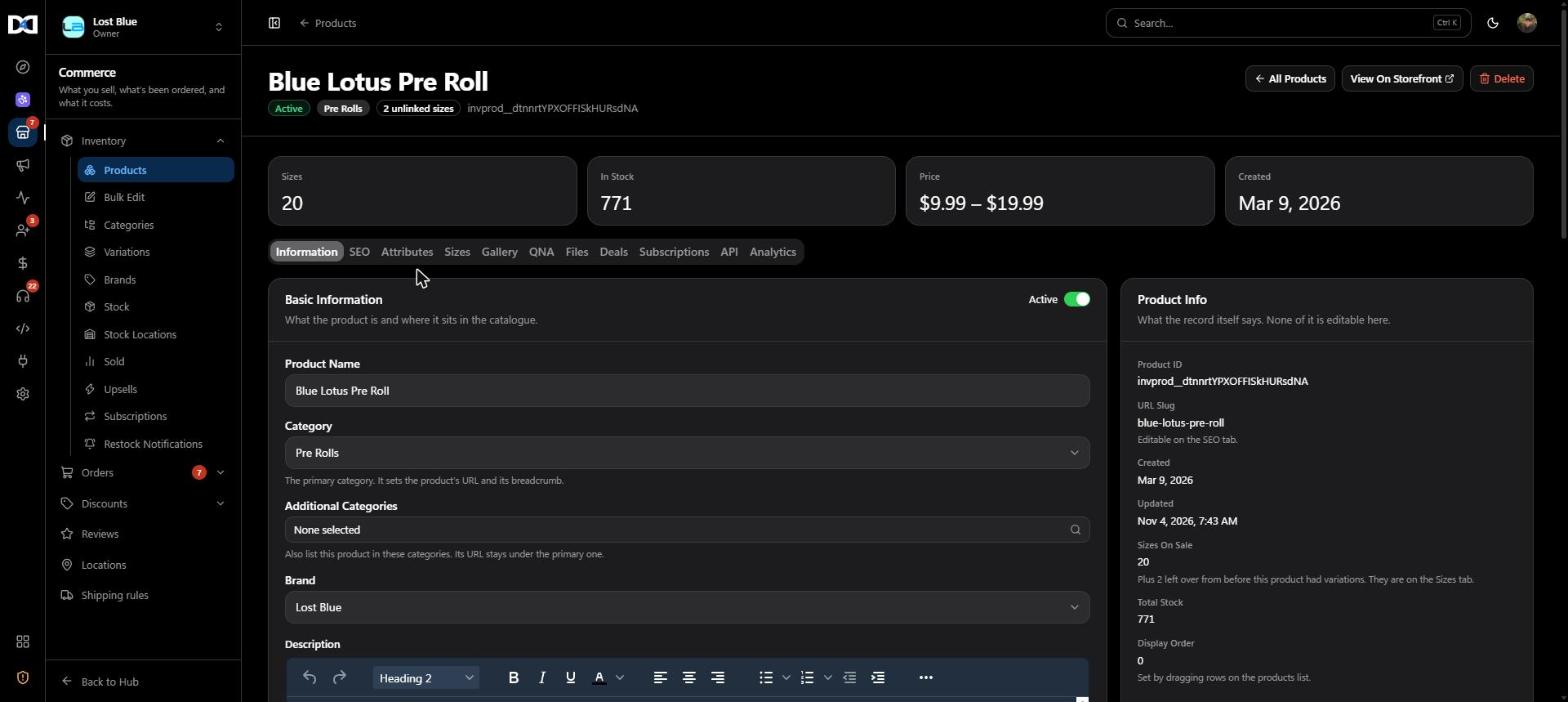
2. Add sizes and prices
A product is sold in one or more sizes (for example "2ct" and "5ct", or "100 ml"). If it also has variations (flavors, colors), the Sizes tab is a grid: every variation against every size, and each cell has its own price and stock.
Open the Sizes tab.
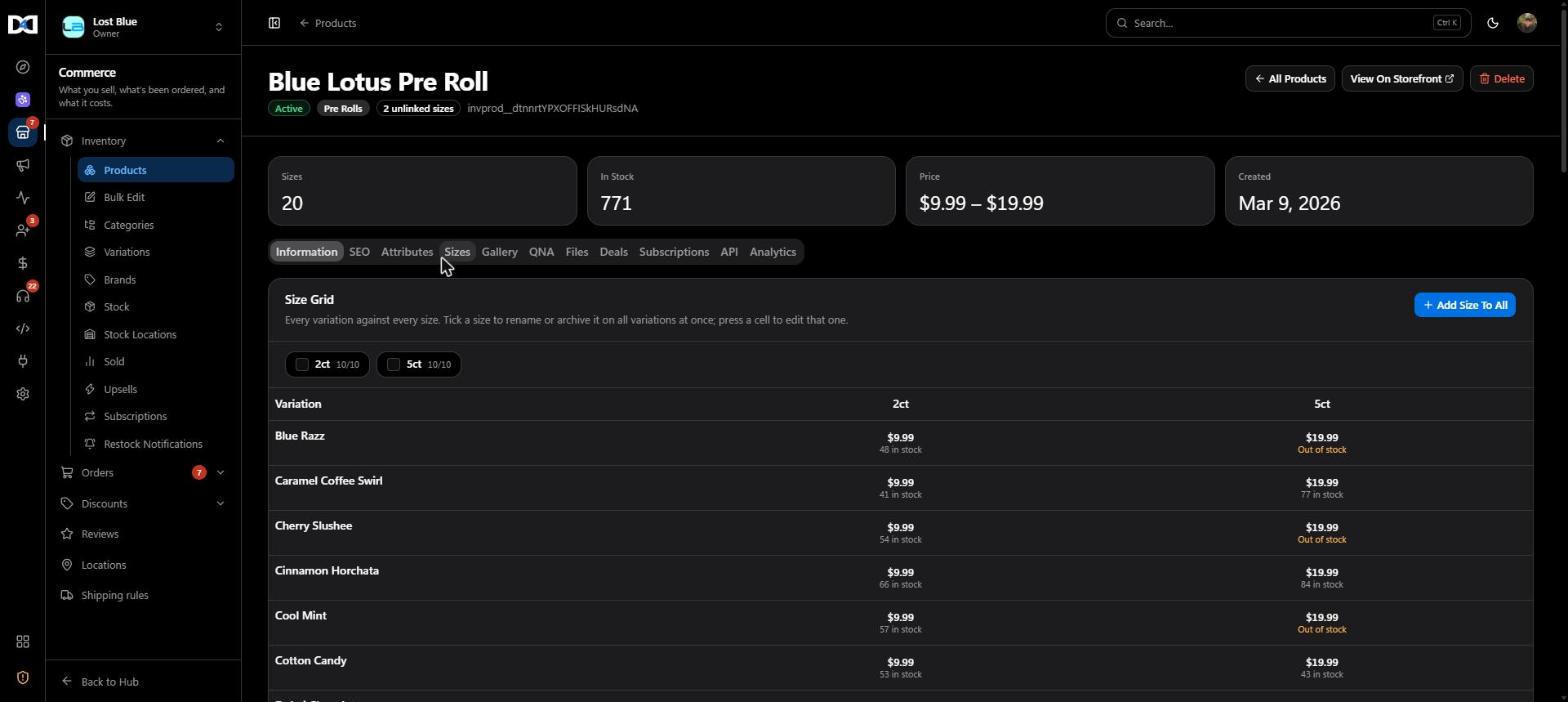
Add a size. Add Size To All adds a size to every variation at once.
Set prices and stock. Press a cell to edit that variation's price and stock for that size. Tick a size at the top to rename or archive it on all variations at once.
3. Add images
Open the Gallery tab and upload photos. The first image is the main one. Images are stored on our CDN and served at the right size for each screen, so they load fast on phones.
4. Make it findable
- SEO tab: the page title, description and web address (slug) search engines show. Write them for people, not robots.
- Attributes tab: facts like flavor, material or strength, which your site can use for filters.
- QNA tab: common questions and answers for the product page.
- Files tab: documents such as a lab report or a manual.
The other tabs
| Tab | What it is for |
|---|---|
| Information | Name, category, additional categories, brand, description, active. |
| Deals | Bundles and quantity breaks for this product. |
| Subscriptions | Let customers subscribe and receive it on a schedule. |
| API | The product's id and slug, and the API calls that read it, for your developer. |
| Analytics | How the product is doing: views and sales over time. |
Changes are live right away. Your site reads products through the API, so a saved change shows up on the site within a minute or so (sites may cache briefly). View On Storefront at the top of the product page opens it on your site.
Next
Keep reading
Something wrong or missing on this page? Email support@dashfordevs.com.